How to Create & Organize Product Categories in BigCommerce
Step-by-Step Guide
Organizing your store with product categories is essential for a seamless shopping experience. This guide explains the importance of creating product categories in BigCommerce and how to do it.
Steps to Create Product Categories
1. Add a New Category:
- Log into your store and go to the “Products” section.
- Click on “Product Categories”
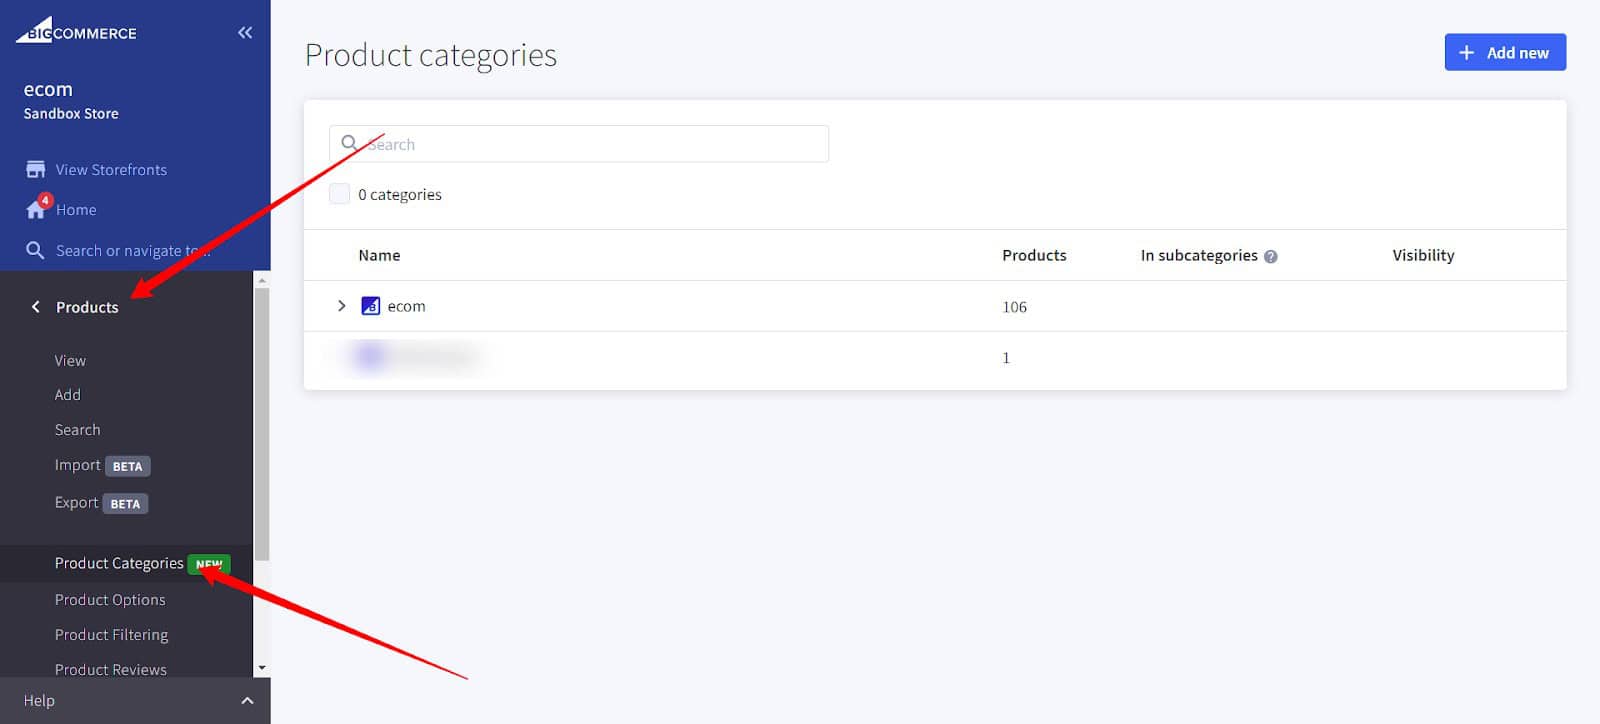
2. Add a New Category:
- Click on the “Add new” button.
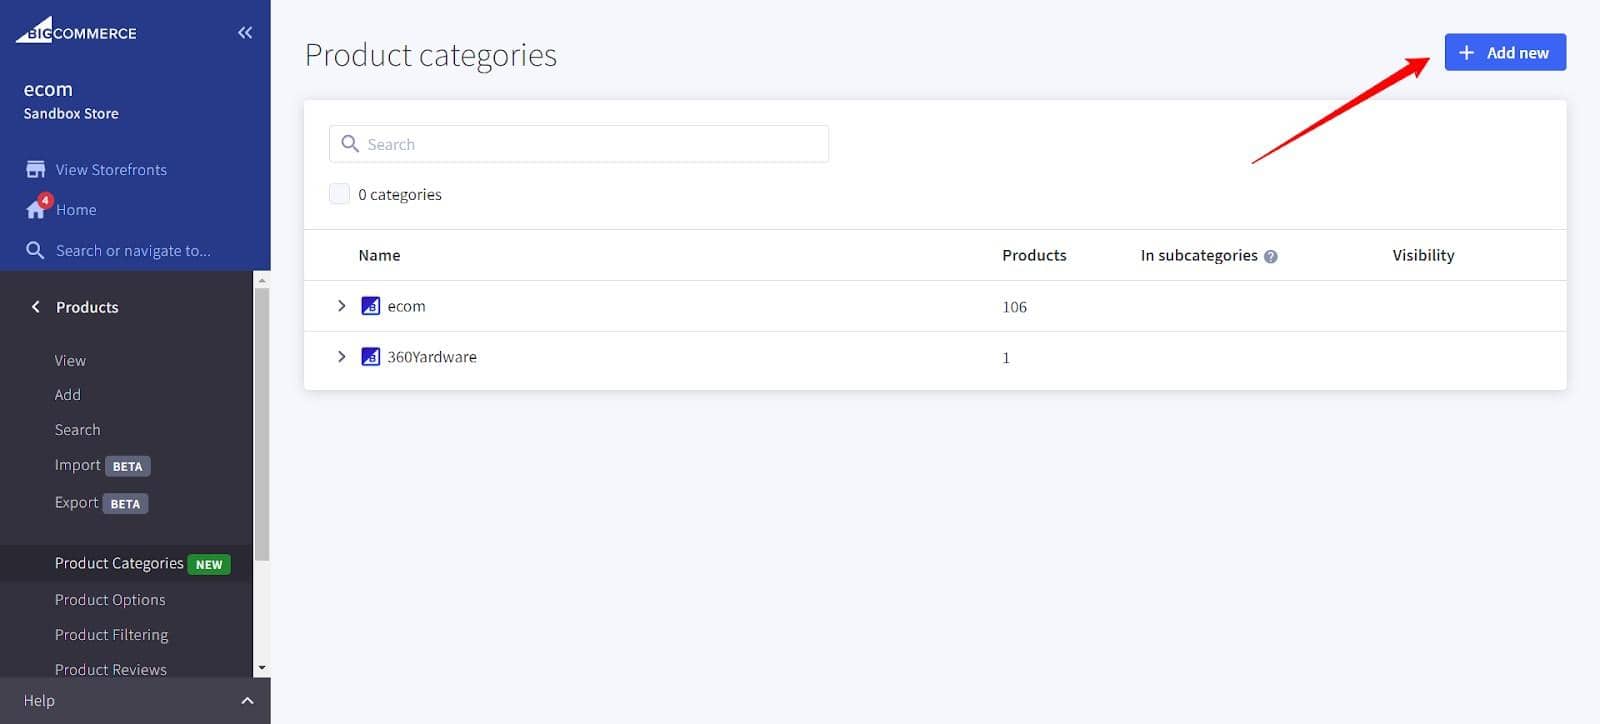
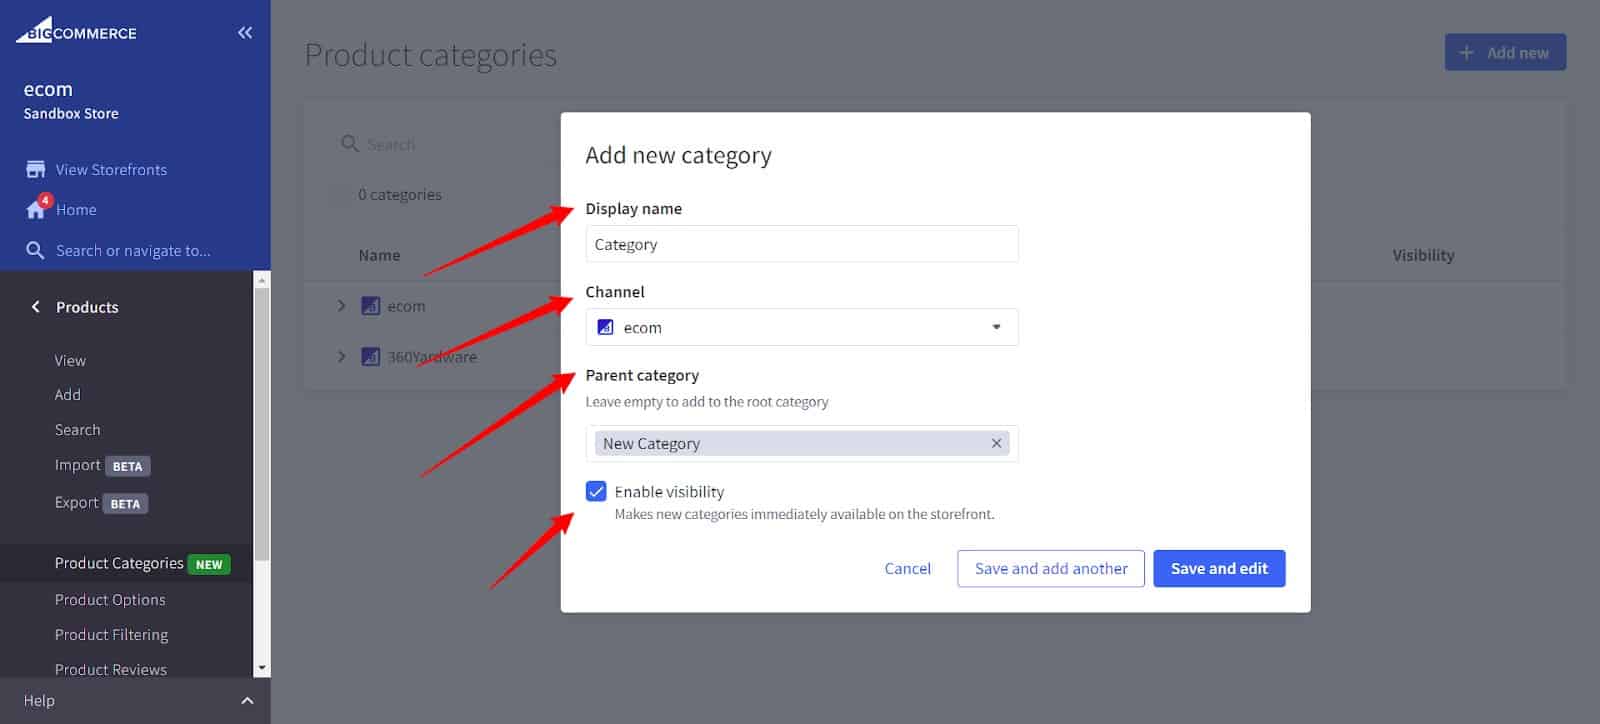
3. Fill in Required and Optional Fields:
- Display Name: The name shown for the category.
- Channel: Assign the category to a specific storefront channel.
- Parent Category: Add a parent category if applicable.
- Enable visibility: Make the category visible on the storefront.
4. Save the Category:
- After filling in all required fields, click the “Save” button.
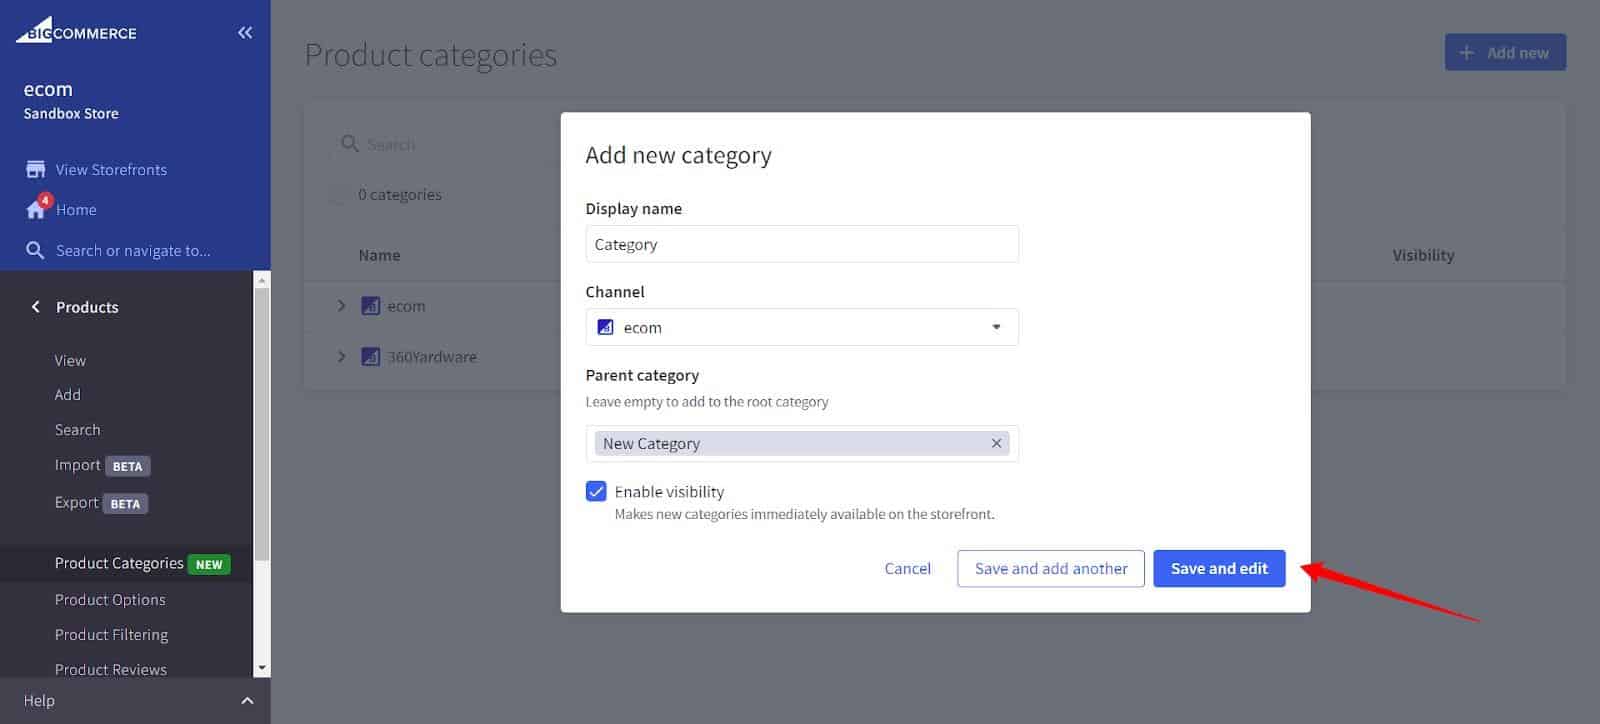
By following these steps, you can create organized product categories that enhance the user experience and optimize store management in BigCommerce.
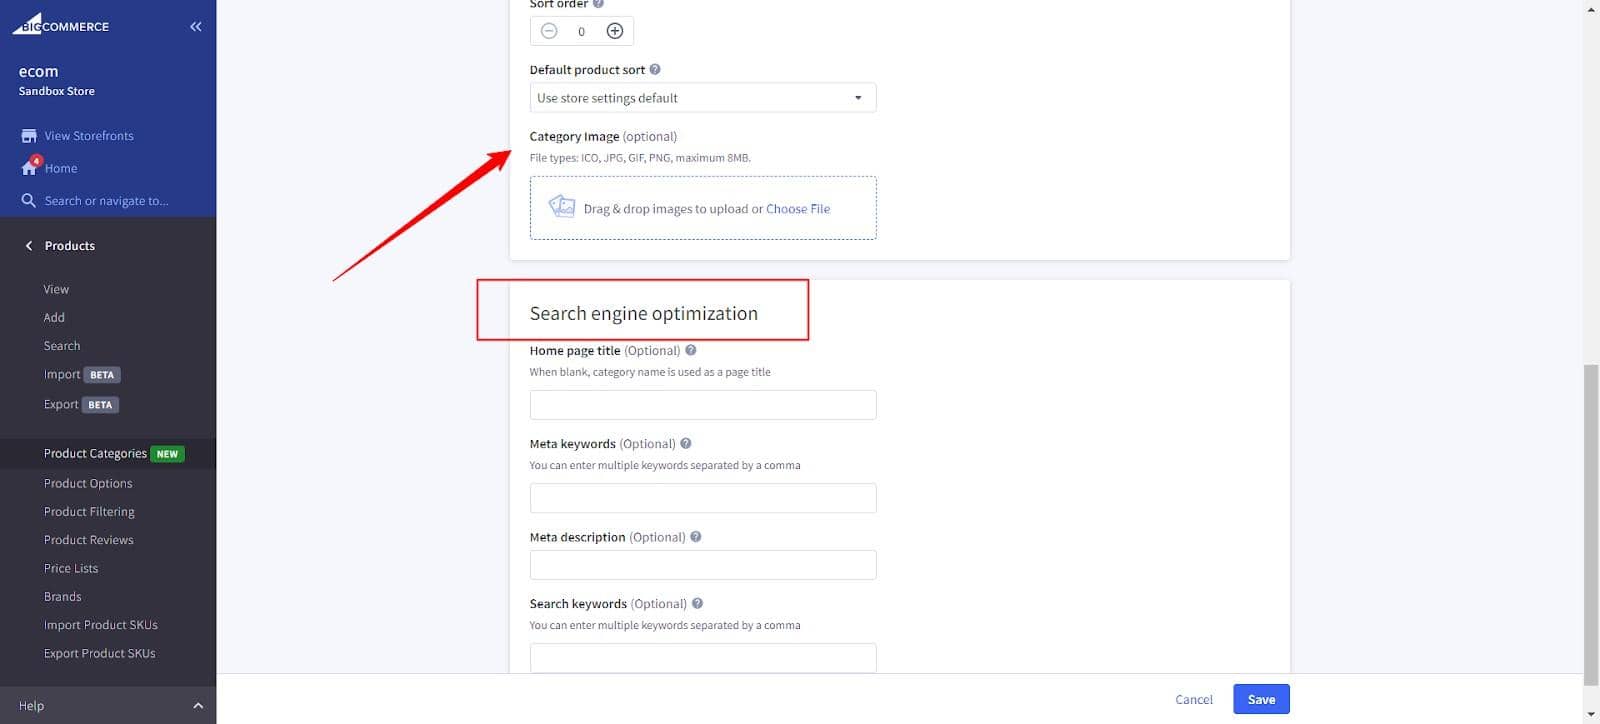
Advantages of Adding Product Categories
- Improved Navigation: Easier targeting of customer segments and tailored marketing campaigns.
- Enhanced Searchability: Better SEO and improved site visibility in search results.
- Enhanced Reporting: Detailed reporting and analysis for data-driven decisions.
- Streamlined Inventory Management: Easier management and updating of product listings.
- Cross-Selling Opportunities: Encourages customers to explore related products, boosting sales.
- Targeted Marketing: Effective targeting of specific customer segments.
Organize BigCommerce Categories with Drag-and-Drop Feature
In the Product Categories section, click and hold a category, then drag it to the desired position. This is a user-friendly feature. You may repeat it for subcategories as well.


Leave a Reply
Want to join the discussion?Feel free to contribute!